Wednesday, April 21, 2021

Flutter By with The Cat's Pajamas

Hi everyone! I am sharing my first post for The Cat's Pajamas.   Today I am sharing a card I made featuring the Flutter By Digital Stamp.    Not only do I think this is the cutest image ever, but I absolutely love the sentiment that I used with the card.   The image comes with 3 sentiments in total- but I knew I had to use this one- because I had just been teasing my husband about still giving me butterflies even after 16 years.


I printed the image on Neenah Classic Crest Cardstock and then cut with a Stitched Circle Die.  I then cut a slightly larger circle with my pattern paper.


I tend to be a Spectrum Noir marker gal, but I decided to break out my Copics for today’s card.

Bunny: N1, N3, N5, N7

Nose: RV52, R32

Net: B00, B02, BG00, BG10, White Gel Pen

I made my card base a standard A2 Card, and then cut my patterned layer at 4″ x 5 1/4″.   I used my distressing tool to rough up the card base as well as my patterned layer.    I then cut a strip in the same cardstock I used for my base, and then cut a strip of pattern paper from the same pattern pack I used for my base layer, and circle.   I then used my distress tool to distress the edges of my circles.


I cut a strip with the sentiment printed on it and then used the same  cardstock from my base and middle strip, to layer my sentiment.   I cut both pieces on an angle and used foam tape to adhere the sentiment strip to the bottom of the card.

A few enamel dots in coordinating colors added the finishing touches.

Don’t forget to check out all the helpful how-to videos on YouTube and don’t miss out on the 30% off sale on all in-stock stamps, stencils, dies, and embellishments in the TCP store.  Get them while you can!

I hope you enjoyed my card, and I cannot wait to continue sharing with you!

Have a fantastic day!

Let your creativity take flight,
Angela

Friday, April 16, 2021

Critter Fun with La-La Land Crafts

 Happy Friday!   This week our theme is Critter Fun and today I have a fun circle card that would be cute on a little gift.   


I stamped the cute little Hamster from the Eat More Cake Clear Stamp set and colored with Copics.

I then die cut the Rainbow in Clouds Die and also did a little Copic Coloring. 

Copics:

E40, E43, E47, E74, R30
BG00, BG13, BG15, BG23
RV55, RV66. V05
White Gel Pen


I then used the Double Stitched Circles Dies and the Pierced Scalloped Circles Dies to make my base- using white cardstock for the base and the Spring has Sprung Pattern Paper for the mat.


I used the Happy Birthday Sentiment from the Ewe Take the Cake Clear Stamp set, and stamped on the rectangle die from the Curved Pocket Die.    


Lastly after assembling my card with foam tape behind the dies and my hamster, I added a few enamel dots in coordinating colors to match and add the finishing touches.


I love how this turned out and hope you enjoyed.

Make sure to join our LLLC FAN GROUP on Facebook for more ideas, 

inspiration and a general chit chat about our products!

Hoping you all have a great week of Creating

Angela


Thursday, April 15, 2021

Pet Loving Marci and her Pets Galore friends from the April 2021 Club La-La Land Crafts Kit

  Hey everyone!   I am back with the reveal for the April 2021 Club La-La Land Crafts Kit.  I say this every month, but I sure love this kit!


The full value of this kit is $78.99
with the Stamps only is $24.00
with the Dies only is $54.99

Thru the Club La-La Land Subscription you pay: 

Product Kit - Stamps and Dies - $39.99
Stamp Kit - Stamps Only - $19.99
Dies Kit - Dies Only - $29.99

The last day to subscribe for this kit is April 30, 2021. 

Now for my cards

First Up I have Pet Loving Marci and some of her Friends from the Pets Galore Rubber Stamp Set.


I used the Pierced Scalloped Rectangle Dies with the Double Stitched Rectangles Dies layered together to create a chunky slimline- not sure if that's a thing, but I will make it one.  ha ha.

 I used the Spring Has Sprung Paper Pack for my Scalloped Dies. 

I then used the On the Wall Layering Stencil Set with Distress Oxide in Frayed Burlap for my background.  I wanted it to be rough.   I then used Black Matte Cardstock from Tonic to cut my Bird Cage Die, Pet Cage Die and the Retro Lamp from the September Club kit.

I colored Marci and her friends with the colors below:

Copics:
Skin: E00, E11, E21, E04, R20
Boots: E70, E71, E74, E79
Shirt: T0, T1
Shorts: B91, B93, B95
Overshirt and Headband: BG10, BG13, BG15 White Gel Pen
Lips: RV66, V05

Bird: RV66, R20, BG13
Hamster: E71, E74, E79

Spectrum Noir:
Hair: BGR1, BGR3, BGR5, True Black
Fish: OR1, OR3
Water in Bag: BT1, BT2

I added a few clear dew drops to the card for the finishing touch.

For a Full Tutorial on this card- sign up to get this kit and an exclusive tutorial


Next up I have a fun fish themed card featuring the fish from the Pets Galore Rubber Stamp Set and the Fish Tank Die


I used the Pierced Scalloped Rectangle Dies with the Double Stitched Rectangles Dies to make my first layer (then cut 2 pieces of cardstock 4 3/4" x 4 3/4" and 4 1/2" x 4 1/2" for my base.

I used the Water Ripples Layering Stencil inside the bowl/tank with Tumbled Glass Distress Oxide.   

I colored the fish and the tank items with the items below:


Copics:
E70, E71, E74, RV66, RV55

Spectrum Noir:
OR1, OR3, AP1, AP3, AP5
White Gel Pen


I used the Double Stitched Circles Dies for my sentiment, but just cut the bottom off. 

I inked with Tumbled Glass Distress Oxide 

Lastly I added some dew drops in Blue and Clear to add the finishing touches. 


Make sure to join our LLLC FAN GROUP on Facebook for more ideas, 
inspiration and a general chit chat about our products!

You can also find great inspiration over at the Club La-La Land Crafts Facebook page.


Hoping you all have a great week of Creating!

Tuesday, April 13, 2021

Elegant Wedding Layout for invitations and more


Hey everyone! I am back with a fun scrapbook page for CutCardstock. Spring Weddings are the best, and my husband and I attended a beautiful one a few weeks back. I just love weddings. They make me so sentimental and I love using the Wedding Colors to create beautiful layouts. This month we are featuring Glitter Cardstock - which is perfect for a wedding layout. For my first layout this month, I created a layout that showcases the Wedding Invitation, as well as the Wedding Card which gave all wedding info.
This image has an empty alt attribute; its file name is 169899621_10219035147978743_3166731376106432232_n.jpg

I used the Silk Glitter Silvermist Cardstock as my featured product and have a fun step by step for you creating this layout.


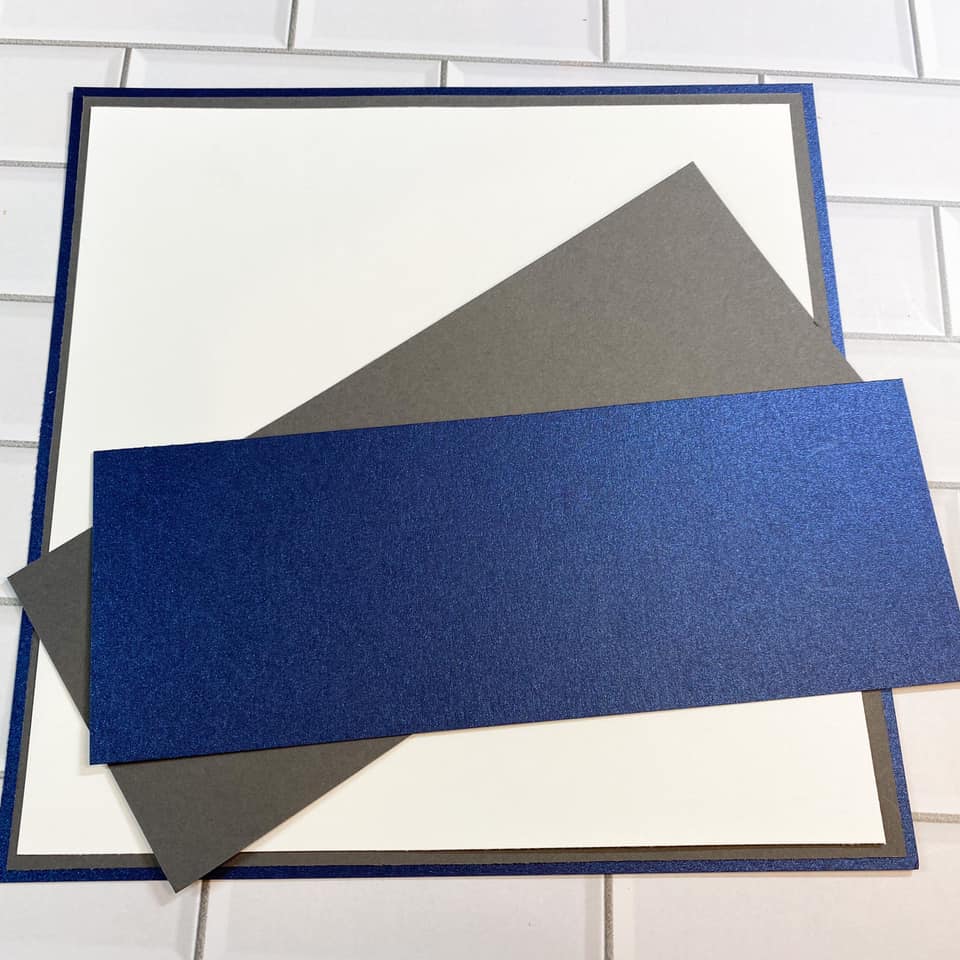
I started with 3 sheets of cardstock-


This image has an empty alt attribute; its file name is 169496095_10219032875881942_1775217350089900601_n.jpg

I show the white in the middle in the photo above- however the white will be your top layer.


This image has an empty alt attribute; its file name is 169490240_10219032877681987_9080040450447069593_n.jpg

Adhere all 3 layers as shown above.

Next cut 2 strips of paper- Curious Metallic Ink- 8" x 3 1/4", Basis Grey- 8" x 3".

This image has an empty alt attribute; its file name is 170043153_10219032874761914_7367787469014164124_n.jpg

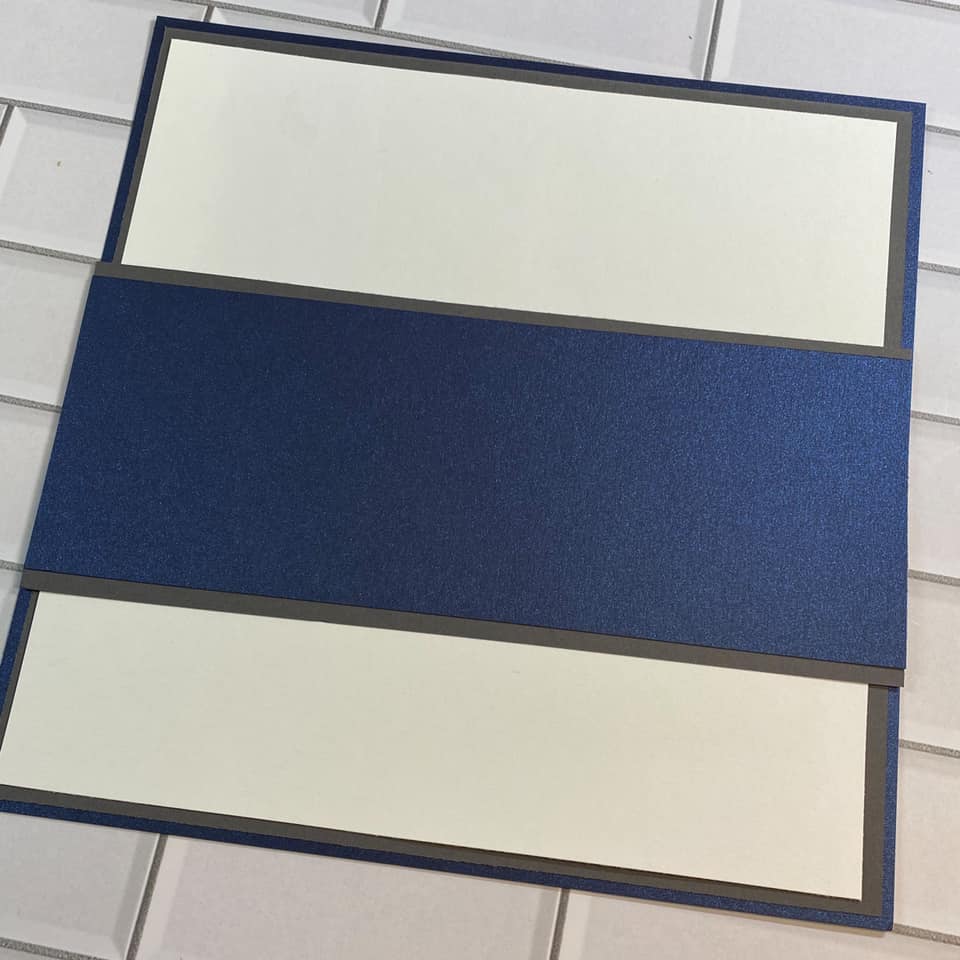
Next layer the Curious Metallic Ink cardstock and the Grey cardstock and add as shown below.

This image has an empty alt attribute; its file name is 169908807_10219032874241901_3110106478628271023_n.jpg

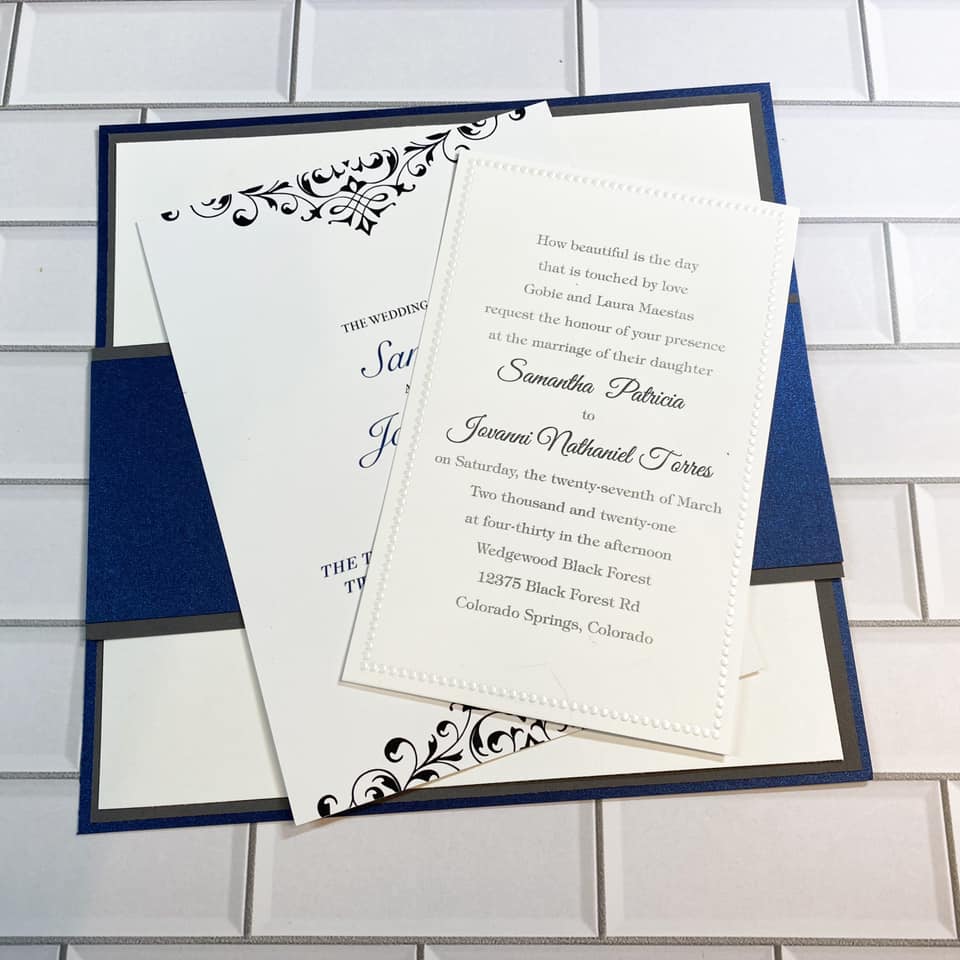
Below you can see the Invitation and Wedding detail card which are going to be center stage.

This image has an empty alt attribute; its file name is 169665330_10219032876321953_1021953836391014800_n.jpg


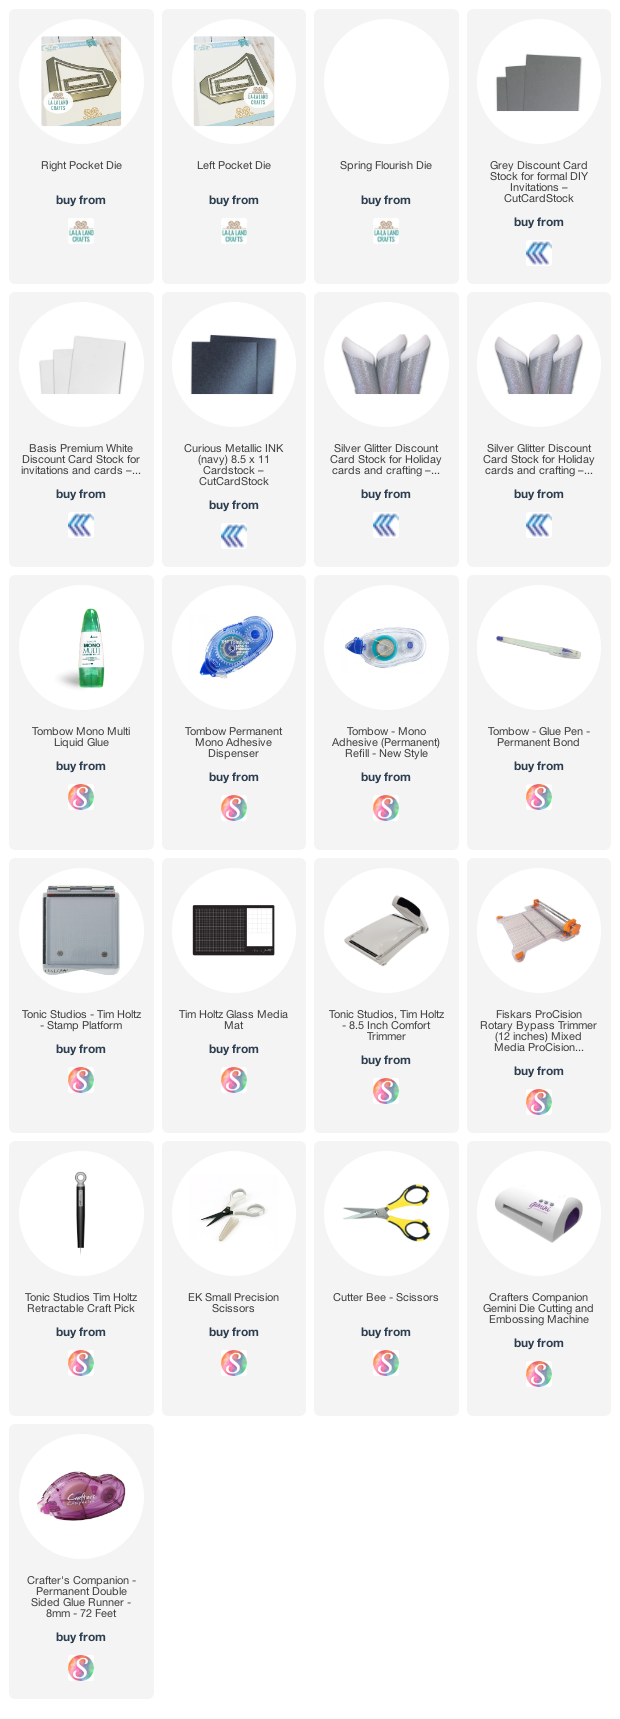
Next up, I used 2 dies- a Right Pocket Die and a Left Pocket Die- and cut my pockets with the Silk Glitter Silvermist Cardstock

This image has an empty alt attribute; its file name is 169490241_10219032876841966_3249768891988694653_n.jpg


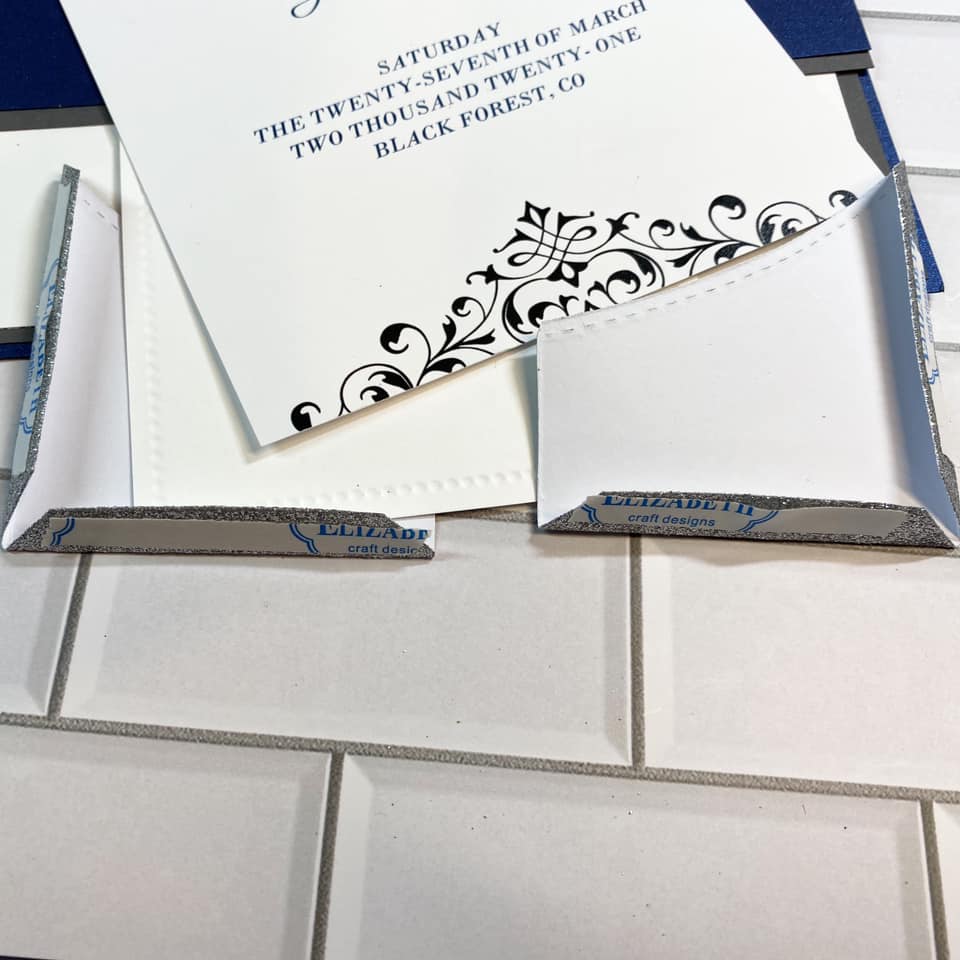
Next, add some double sided tape to both pockets.

This image has an empty alt attribute; its file name is 169548659_10219032877361979_3082646481961843722_n.jpg

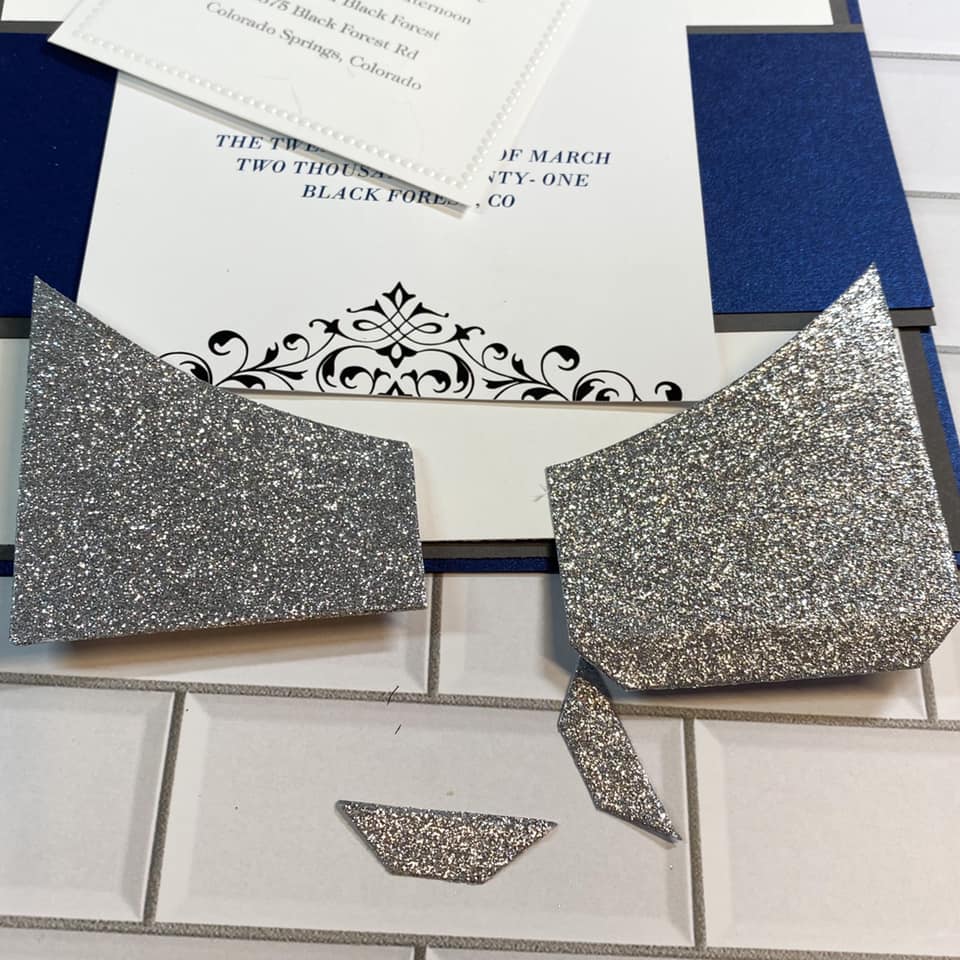
I cut off the end pieces that would meet in the middle to create my large pocket.

This image has an empty alt attribute; its file name is 169800594_10219032873921893_2012600237752430339_n-1.jpg

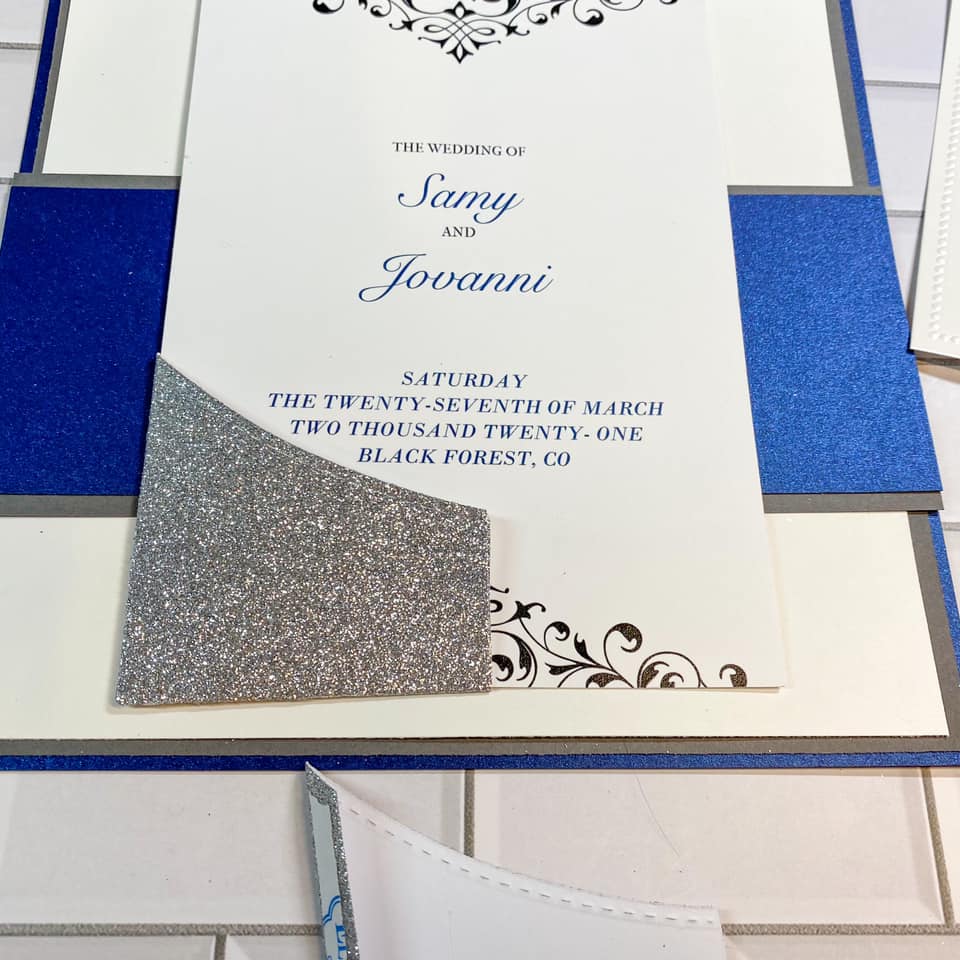
I find it easiest to add the pockets to the largest of the items that the pocket will hold before adhering the pocket to the layout to ensure everything fits OK.

This image has an empty alt attribute; its file name is 169657745_10219032875281927_5975312037568077741_n.jpg

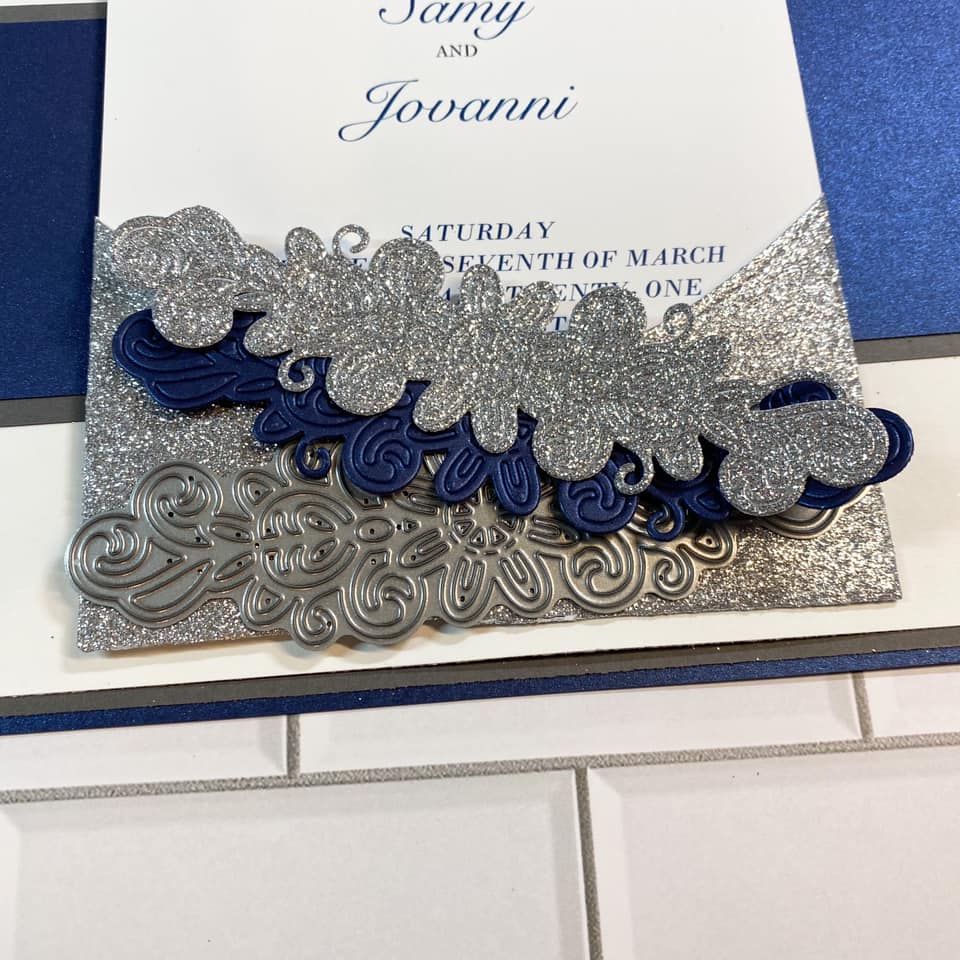
Once both sides of the pockets are applied, I cut a fancy die to cover the pocket. This die below is called Spring Flourish Die. I cut with both my Silk Glitter Silvermist Cardstock as well as my Curious Metallic Cardstock.

This image has an empty alt attribute; its file name is 170166248_10219032876601960_4224259468186628170_n.jpg

I added both to my pocket as shown below, and added a gemstone to the center of the die cut. I love how the die looks like a monogram with the gorgeous cardstock.

This image has an empty alt attribute; its file name is 169922517_10219035147858740_4889996611349311496_n-1.jpg

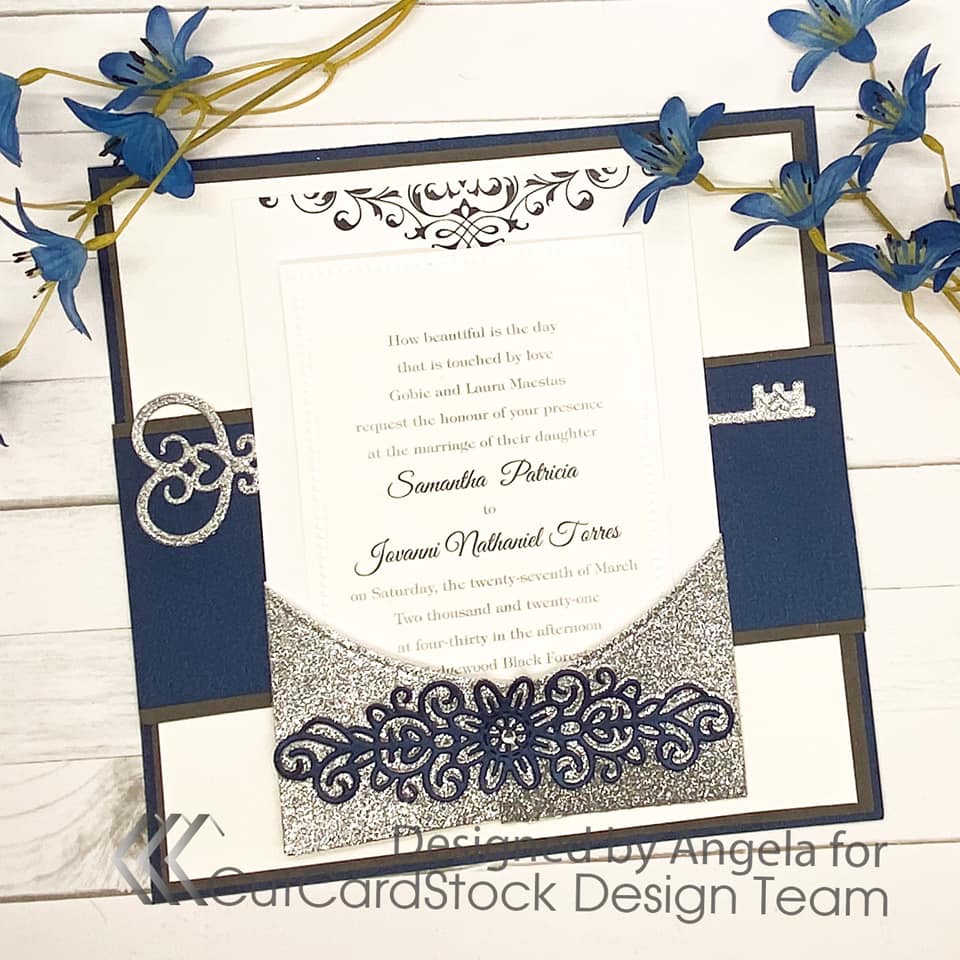
Lastly I used a Key Die with the Silk Glitter Silvermist Cardstock and cut the key in half. I put half to the right and half to the left as seen below.


And here you have the finished page. I love how it turned out.

This image has an empty alt attribute; its file name is 169899621_10219035147978743_3166731376106432232_n-1.jpg

Stay tuned for my post at the end of the month for the companion page for this layout!

See you soon!

Friday, April 9, 2021

Spring Fever with La-La Land Crafts

 Happy Friday!   Today I am back with fun card for our theme this week- Spring Fever. 

What's better in the Spring than planting flowers- and I can hardly wait to get out into our flower beds and plant.  Here in Colorado we can still get snow into May so I always wait until around Mother's Day, but I am definitely eager to get out there.

I used one of the Bunny stamps from the Oh, Crop! Clear Stamp set, and decided he would be planting flowers.  The Grass Border Die, and Flower Bunch die paired perfect with my little scene.  


I can't get enough of the Spring Has Sprung Paper Pack, so I pulled several sheets out that had pinks in them.  

Spectrum Noir:

IG1, IG3, IG5, PP3, MB1, MB3, BP1, BP3, BP4,

White Gel Pen


I used the Double Stitched Squares Die for my base for the bunny, and used the Large Half Doily Die above the bunny.  


I added my sentiment to one of the Long Flags Dies, and then finished my card off with some pink pearls. 


I love how this turned out and hope you enjoyed.

Make sure to join our LLLC FAN GROUP on Facebook for more ideas, 

inspiration and a general chit chat about our products!

Hoping you all have a great week of Creating

Angela


Thursday, April 8, 2021

Fly High with The Cat's Pajamas- revisisted with big news!


Hey everyone!  Today I am back revisiting a card I made last summer and I have some big, and exciting news!   I am so excited and honored to be joining The Cat's Pajama's Design Team!   I have been a big fan of this stamp company for the longest time and was so honored when I was invited to join the Pack. 
Originally I had hoped to have a new card ready for you today, but some side effects from that oh so fun Covid Vaccine have me revisiting an older card.   It needs more love anyway!

Today I am back with a fun card featuring Fly High from the Cat's Pajamas.  This is an older set, that I attempted to find to link to, appears is possibly retired.


I cut my base in 5 x 5 and inked with Spectrum Noir Water Reactive Ink in the following colors:

Anthracite
Jet Black
Crushed Velvet
Midnight.


I blended back and forth trying to make a space scene.

I then added white gel pen to add stars.


I stamped the image with Spectrum Noir Alcohol proof ink and cut with my Scan N Cut.


I colored with Spectrum Noir Illustrators:

BG1, BG3, BG5
CG1, CG3, CG5
AB1, AB2, AB3
IB1
LG1, LG3
OR1, OR3
GY1, GY4

I added some glossy accents to the helmet and carrot helmet


I mounted the bunny on a action wobbler to give him a bit more of a floating look.

I then mounted on black cardstock and added the sentiment.


I hope you enjoyed!  

See you soon!

Tuesday, April 6, 2021

Plant Mama from the March 2021 Club La-La Land Crafts

 Hey everyone!


Today I am back with a fun card and tag featuring the March 2021 Club La-La Land Crafts Kit.  

First up, I have a slimline like card- only for this one I used the Double Stitched Square Dies along with the Scalloped Squares Die. I used the Spring Has Sprung Paper Pack for my pattern paper, and then the fun flower pots and plants to the right and left of Plant Mama Marci.    With the sentiment, I thought this was perfect- and wanted to showcase the fun dies!   


I colored with Spectrum Noir Illustrators:

Skin: FS6, FS7, FS8, PP3
HairL: EB1, EB3, EB5
Shirt, shoes and bandana - PP1, PP3, PP4, PP5, PP6
Pants and overshirt: IG1, IG3, IG5
Flower Pots: IG1, IG3, IG, PP1, PP3, PP5
Greenery: DG1, DG2, DG3, DG4
Flowers: PV1, PV2, PV3, PV4
White Gel Pen 

A few enamel dots add the finishing touches.  


Next up I have a fun tag I made featuring the Smarty Plants Rubber Stamps.   They are busy caring for Marci's plants.   I used the Plant Shelf Die as well as the Plants Die to create my tag.    The Large Stitched Tags Die - paired with the Spring Has Sprung paper pack just perfect.     


Spectrum Noir :

IG1, IG, 3, IG5, PP3, JG1, JG3, JG5, 

GY1, GY3, GY4, GY5, TN1, TN3, TN5, 

BP1, BP3 White Gel Pen

I added a few enamel dots to the tag to coordinate with the colors.


                Make sure to join our LLLC FAN GROUP on Facebook for more ideas, 
inspiration and a general chit chat about our products!

You can also find great inspiration over at the Club La-La Land Crafts Facebook page.


Hoping you all have a great week of Creating.