Monday, January 27, 2020

Creating a Mystical background

Today I am back with a fun tutorial creating a mystical sky.
I have always been into the movies in the fantasy genre.  I love Lord of the Rings, The Witcher, Game of Thrones and yes, I am dating myself Willow.  So when I created this card I pictured a foggy mystical night.


Products used:
Harmony by Spectrum Noir Water Reactive Ink:  Pale Fig, Oasis, Noir Black, and Fuschia, Parakeet
Harmony by Spectrum Noir Quick Dry Ink: Noir Black
Crafter’s Companion Stamps: Enchanted Christmas Forrest Foliage, Sparkle all the Way and Simply Stags
Neenah Solar White Classic Crest Cardstock
CC Black Matt Cardstock


Now onto the steps:


Cut your Neenah Solar White cardstock down to 5 x 7 (or desired size).

Start with Oasis Water Reactive Ink


Next add in Pale Fig


Now add in Fuschia

You can work back and forth to get the blend that you would want.    After Fuschia go back to Pale Fig, then Oasis.   

If you want a darker more vibrant look, add in Parakeet.


Again work back and forth between your colors until you get the blend just how you want it.


Add in Black Noir to get more of a mystical/foggy scene.


Again continue to blend until you have it just how you want.    


Stamp your images with the Quick Dry ink 

Next you may choose to spritz the panel with water to allow the ink to react.  

Mount the image panel on a card base - black matt cardstock and stamp the sentiment on your white cardstock.   Ink the sentiment with the Pale Fig Ink. 

And now you have the finished product.   A mystical scene straight out of the movies.

I hope you enjoyed.   


Friday, January 10, 2020

LumberJack Boys


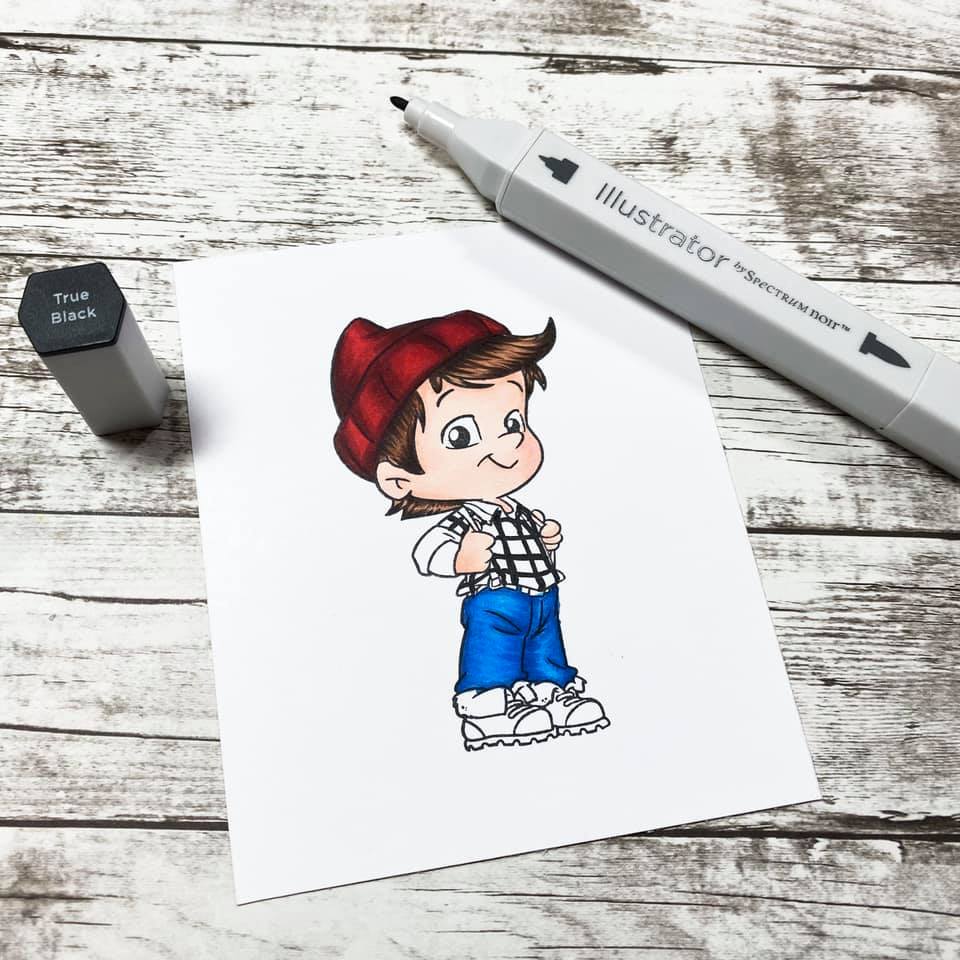
Today I am back with a fun tutorial featuring LumberJack Boys from CC Designs.


Products Used:

Spectrum Noir Illustrators:

FS6, FS7, FS8
DR2, DR4, DR7
EB1, EB4, EB7
TB1, TB3, TB5
IG2 
Colorless Blender
True Black


Other: Stamp CC Designs- LumberJack Boys
Cabin Fever 6x6 Paper pad- Brutus Monroe 


First start with Skin:  FS6, FS7, and FS8.   


Next Hair: EB1, EB4, and EB7.  You will want a bit of distance in your numbers to get the right shading/highlights


Next Color the Hat:  DR2, DR4. DR7


Next Jeans: TB1, TB3, TB5


Now onto the Flannel shirt.  Start with True Black to accentuate the lines in the shirt


Then add in the same red combo used in the Hat: DR2, DR7 (because the spaces are small you can omit the middle shade DR4 and work back and forth with the red combo and black.


Next add a bit of color to his undershirt with IG2 and the colorless blender.


Last for the shoes the same brown combo was used:  EB1, EB4, EB7


And for the finished product!


In the end (not photographed I punched 2 holes in the top and attached to loose binder clips and attached to an Ikea Frame). I will do a step by step tutorial on this soon.

I hope you enjoyed this step by step coloring and project. See you soon!

Wednesday, January 8, 2020

Surprise!!!


Today I am back with a fun birthday card featuring Surprise! from CC Designs.


I then colored with
Classiques- FS4 and PP1 

Illustrators. PV2,3,4 BT3,6,9 IG 2,6 

True Black, FS6,7,8 Colorless Blender.


I used the Sara Signature Vintage Lace Baroque Frames to cut the image and the dies I backed it with. And for the sentiment I used the same dies and popped up with some foam tape.


I added some Roses from I am Roses.

A few paper doilies and enamel dots finished off the card.

I hope you enjoyed.  

See you soon!


Thursday, December 5, 2019

Live it up!

Today I am back with a fun tutorial featuring a fun digi from Power Poppy and colored with Spectrum Noir Products

Products:  TriBlends:
Dull Green Tri-Blend, Citrus Green Tri-Blend, Jade Green Tri-Blend, Citrus Tri-Blend, Ice Grey Tri-Blend, Brown Grey Tri-Blend
Classiques: TB1, TB3, TB5
Harmony Water Reactive Ink- Midnight

Neenah Solar White Classic Crest Cardstock
Other- cardstock, pattern paper and enamel dots


Typically when I start any project I pick my stamp or image (in this case I used a digital stamp) and then I pick out my papers and embellishments.  This helps me choose the colors I want to use to color my image.  
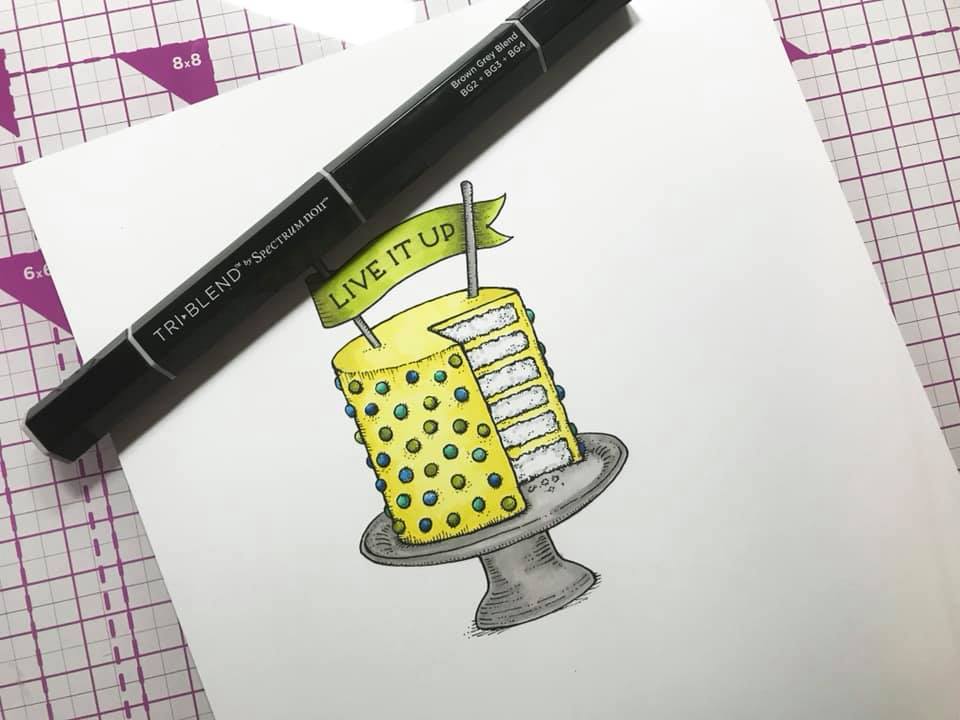
Below I show my papers with my colored image.   


I printed my image on Neenah Solar White Classic Crest Cardstock. 

Next I used the Citrus Blend Tri-Blend Marker to color my cake frosting.


Next I used the Citrus Green Tri-Blend to on some of my cake embellishments.


Then I used some Classiques- TB1, TB3, TB5


Next - Jade Tri-Blend was used for some of the dots on my cake.  


Lastly for the cake dots I used my Dull Green Tri-Blend.   


I continued to work back and forth with the above color combinations until I had all of the dots colored. 


Next I used the Citrus Green Tri-Blend to color my banner.   


Next I used the Ice Grey Tri-Blend - lightest color (IG2) and lightly stippled in color on my cake.   I wanted white cake, but it needed a bit of color.


Lastly for my image I used the Brown Grey Tri-Blend to color the plate and banner holders.  


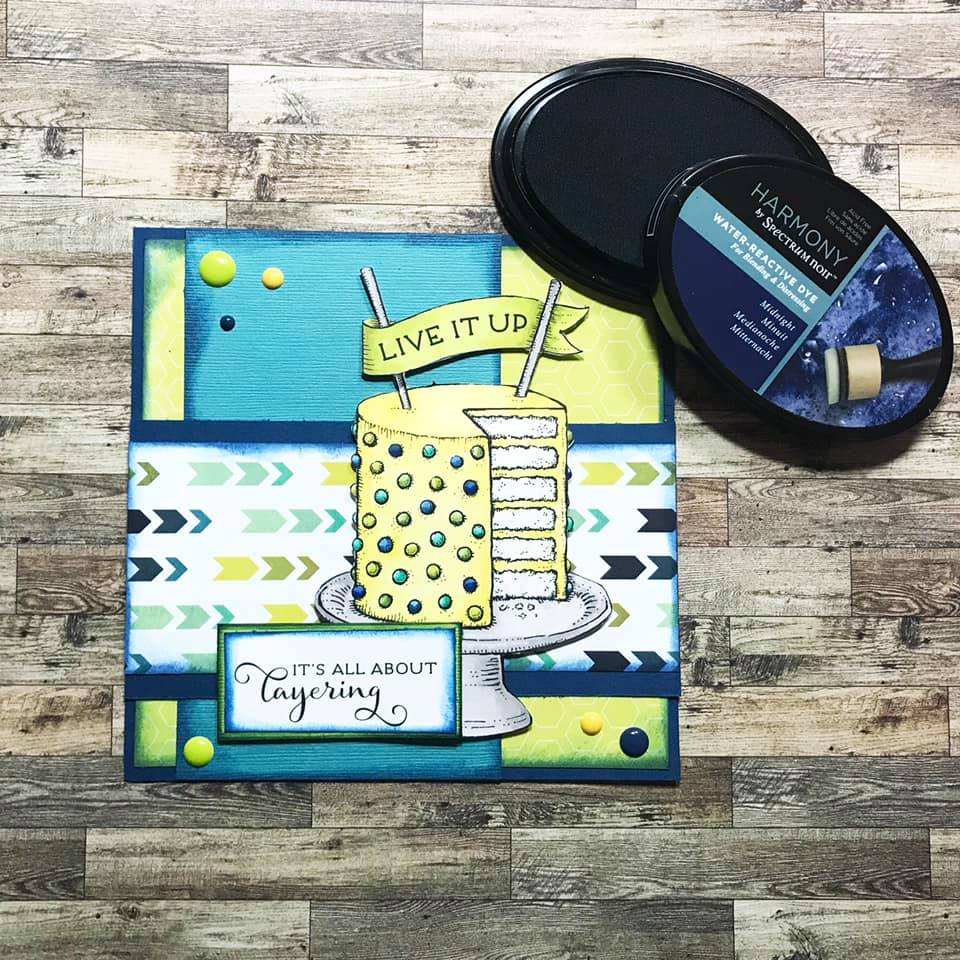
Next I inked the edges of my pattern paper and cardstock with Harmony Water Reactive Ink in Midnight.    I fussy cut my image, assembled my card and then added some enamel dots and inked my sentiment strip.  

And here you have it the finished product!


I hope you enjoyed!

See you soon!


Tuesday, October 8, 2019

Fangs for the Memories


Today I am back with a fun card featuring Vampy Wishes from CC Designs.  You can also get the outline die.     


I then colored my image with Spectrum Noir Markers:

Triblends: Ice Grey Blend, Fair Skin Blend, Dark Red Blend, 
Classiques: IG2, IG5, IG7, 
Originals: IG9


Next I ran the stamp through my Gemini with the die that coordinates with the stamp set.  

I used the Halloween Die from CC Designs for my Spider Web and spider and bat.

I used pattern paper from Authentique and cardstock from my stash to create the card layers.

I placed a few glittery enamel dots from Doodlebug in the corners. 

I used Harmony Water Reactive Ink - Chinese Red to ink my sentiment strip.

I hope you enjoyed.

See you soon!


Sunday, September 29, 2019

Brew It Anya from Greeting Farm and Spectrum Noir


It's International Coffee Day so I couldn't let the day go without a card.    Sharing Brew it Anya from the Greeting Farm and colored with Spectrum Noir products.  


I used Tri Blend- Brown Grey Blend, and Fair Skin Blend.   Also used the original markers- TB1, TB3, TB5, TB7, MB1, MB3, DR1, DR3, DR5, DR7, BG1, Colorless Blender and then Illustrators- TN1, TN3, TN 5.


I used some coffee themed paper from my stash that I had gotten from Club Scrap.   I used a real coffee jacket for behind the image.   I also used a paper doily from my stash, and some heart shaped gems also added great finishing touches.


I hope you enjoyed.   See you soon!


Wednesday, September 25, 2019

Butterfly Meadow from Crafter's Companion

I read a quote once that really resonated for me- "without change there would be no butterflies"- this is so very true.    I love butterflies so I was so excited to color this stamp up from Crafter's Companion- Butterfly Meadow.


I stamped the butterfly 2x with Finesse by Spectrum Noir- Alcohol Proof Ink in Noir Black on Neenah Solar White Classic Crest Card Pack.   

I colored with Spectrum Noir Original Coloring System markers:  BT1, BT3, BT4, BT6, IG3, IG5

I added the Crafter's companion Scalloped Filligree border die and added it in between my 2 butterflies, which I fussy cut out of the cardstock.


I also used some Black Matt Cardstock from Crafter's Companion which is my hands down favorite black cardstock.


I used some teal cardstocks from my stash, as well as a few gems from Studio Katia to add the finishing touches.

I hope you enjoyed!


See you soon!