Wednesday, June 30, 2021

Fireworks!

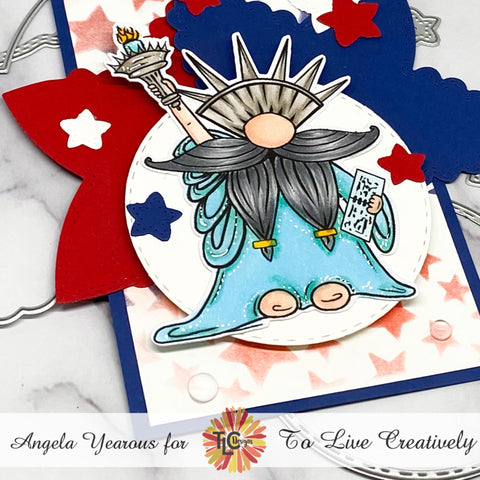
 Hey everyone! I am with another scrapbook page for Cut Cardstock featuring Pop-Tone cardstock. Since this month we are all about Patriotic things – I thought it would be fun to scrapbook some fireworks photos from a 4th of July event my husband and I go to yearly. I absolutely love fireworks and had not been to a display- only seeing on TV until I met my husband and our first 4th of July together he took me to a show. I look forward to resuming our annual tradition this year.

Scrapbook Some Fireworks!

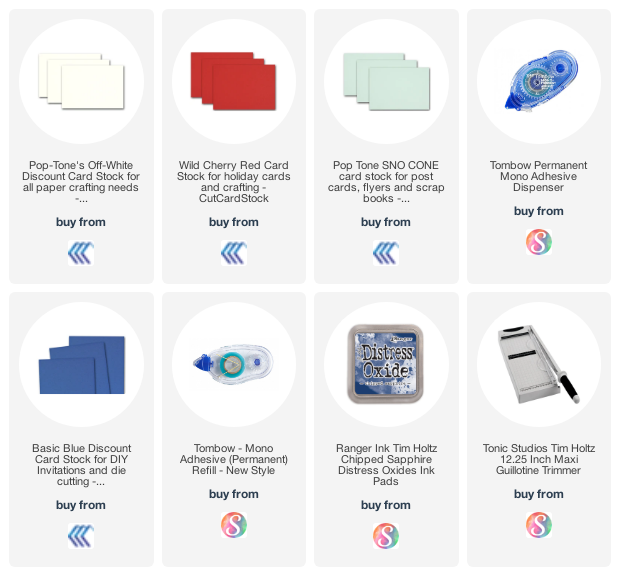
I started with 2 pieces of Pop-Tone cardstock- Pop-Tone Whip Cream Cardstock at 8″ x 8″ and Pop-Tone Wild Cherry Cardstock and 7 3/4″ x 7 3/4″. This is the base of our layout.

Next, I inked both layers with Catherine Pooler Ink – Suede Shoes. For this layout, I used an ink blending tool to ink my edges.

After my layers were inked- I adhered the 2 together with a tape runner.

Next, I cut a piece of Basis Blue Cardstock at 4″ x 7″ and a piece of pattern paper at 3 3/4″ x 6 3/4″. Once I had both cut, I inked the edges of the pattern paper with the same ink.

And then adhered the pieces together and adhered to the layout towards the top.

Next I used Pop-Tone Sno Cone to mat my photos, and once adhered, inked the edges.

Next, I adhered my photos to the layout and added some coordinating stickers to the layout, adding the finishing touches to the layout.

Scrapbook Some Fireworks!

I love how this turned out and can’t wait to get some new photos this year. I hope you enjoyed watching me scrapbook some fireworks! Do you have any 4th of July traditions? I would love to hear them.

Until next time my friends-

Angela

Tuesday, June 29, 2021

Be A Superhero with The Cat's Pajamas

 Happy Tuesday everyone!   I am back with a fun card featuring another fun digital stamp – Superhero.

With the 4th of July coming up this next weekend I wanted to do a Red, White and Blue theme for my card.     

I printed my image on Copic Xpress It cardstock and colored with Copic Markers:

Bunny: N1, N3, N5, R20

Eye Mask, Cape and Shirt:  R46, R35, R17, B18

White Gel Pen

I cut my cardbase to fit on a standard A2 cardbase using Blue cardstock.  Next I cut a layer of pattern paper (from my stash from CTMH) and inked the pattern paper with Tim Holtz Distress Oxide- Chipped Sapphire.    I cut 2 strips in red and inked them with the same Chipped Sapphire Oxide.

Next I cut a circle with white cardstock to mount my Super Hero  Bunny on and inked with the same Distress Oxide Ink.  I wanted the circle to be like he was standing in a spotlight or in front of the moon, there to save the day!

Next I used foam tape to pop up my bunny with.   I cut the sentiment strip, and then handcut the banner end.   I also inked the sentiment and then used foam tape to pop up and adhere to the card.    Lastly, I used some enamel dots in White and Blue and some Stars in Red to carry on the Red, White and Blue theme.

Who would you give a card to and let them know they are your Superhero?   For me it would be my Mom.    I would love to hear yours!

I hope you enjoyed my card,    See you soon!


Friday, June 18, 2021

With Sympathy- from La-La Land Crafts

 Happy Friday!   This week our theme is Sympathy/Thinking of You and I just knew I had to use this stamp set I had in my bin.


I stamped the image on Copic Xpress It cardstock and cut with my Scan N Cut. 

I colored with Copics:

Skin; E00, E11, E21
Wingss: N1, N3, N5
Dress: W1, W3, W5
Hair: T1, T3, T5
White gel pen


I used the Double Stitched Ovals Die and the Pierced Scalloped Ovals Die to layer behind the image.

Once I adhered everything, I the top layers to the base layers with foam tape.


 Next I cut a strip of Vellum and stamped the sentiment on.   

I folded the edges over and created a band over the image.


Lastly I added a few silver glitter enamel dots

And there you have it a simple yet elegant card to give to someone to express your condolences.


Make sure to join our LLLC FAN GROUP on Facebook for more ideas, 

inspiration and a general chit chat about our products!

Hoping you all have a great week of Creating

Angela


Tuesday, June 15, 2021

June 2021 Club La-La Land Crafts Kit- Marci on Bike and Foxy Thing

Hey everyone!   I am back with the reveal for the May 2021 Club La-La Land Crafts Kit. Irina sure outdid herself this month as the stamps and dies are just perfect.  


The full value of this kit is $76.99
with the Stamps only is $24.00
with the Dies only is $52.99

Thru the Club La-La Land Subscription you pay: 

Product Kit - Stamps and Dies - $39.99
Stamp Kit - Stamps Only - $19.99
Dies Kit - Dies Only - $29.99

The last day to subscribe for this kit is June 30, 2021. 


Now for my cards:


I made a slimline card by layering several of the Scalloped Rectangles Die and the Double Stitched Rectangles Die.  I used the Spring Has Sprung Paper Pack for the base.  

Next I cut several pieces of white cardstock with the Double Stitched Hills Border Die and inked it with Mowed Lawn Distress Oxide Ink.

Next I used Tumbled Glass Distress Oxide with the Summer Is Here Layering Stencil to create my sky.

After creating my sky, I layered my Hill Border Die and adhered to the card.

I cut the Windmill Die with paper from the Home for Christmas Paper Pack and white cardstock (and silver for the blades) and once assembled I tucked into the Hills.

I colored my images with Copics:

Skin: E00, E11, E21, RV10
Hair: E11, E13, E15, E18
Jacket: B91, B93, B95, B97,
Dress, Hairtie and shoes: YR15, Y17, Y35, White Gel Pen
Fox: E11, E13, E15, E18, R20, W1, W3, W5
Foxtails: YG63, BG93, BG10, BG13, BG15
Bike: W1, W3, W5, BG10, BG13, BG15, 100

I used foam tape to adhere Marci to the card, and then added my fox to the card.   

Next I added a few of the Snapdragon Dies to the card, and the Clouds from the Stitched Sun and Clouds Die Set to the sky.

For the finishing touches I added the sentiment on the largest of the Stitched Ribbon Die and cut down to fit at the bottom.   


Now for my 2nd card


I used the Stitched Nested Circle Die and again the Double Stitched Hills Border Die and Summer is Here Layering Stencil to create my scene.


I colored my Fox and Snapdragons with Copics:

Fox: E11, E13, E15, E18, R20, W1, W3, W5
Foxtails: YG63, BG93, BG10, BG13, BG15
White Gel Pen


I again used the Stitched Sun and Clouds Die to add to the scene.

Club Members will receive a full tutorial for this card.

Make sure to join our LLLC FAN GROUP on Facebook for more ideas, 
inspiration and a general chit chat about our products!

You can also find great inspiration over at the Club La-La Land Crafts Facebook page.


Hoping you all have a great week of Creating!

Sunday, June 13, 2021

Gnorman for All from TLC Designs

Hey everyone!   I'm back with a fun card featuring Gnorman for All.  

He happens to be a free digital stamp and I knew I had to make a 4th of July card with him.

I love all things Red, White and Blue and just knew he would be perfect. I used Chipped Sapphire and Candy Apple Distress Oxide with a star stencil to create my background on Whipped Cream Pop Tone Cardstock.   I used the Circle die from Aztec Sunshine Die behind Gnorman.
I colored him with Copics- 
Skin- E00. E11. E21
Robe- BG10, BG13, B00, B12
Crown: W1, W3, W5 and holder
Hair and Mustache- N0, N1, N3, N5
Flame- Y17
Candle B00
I used the Spar Spangled Confetti Die with Red, White and Blue Cardstock and scattered the dies around the card.
I added some clear dew drops from Studio Katia to add the finishing touches.
If you live in the US an celebrate the 4th of July- what are your traditions?  I would love to hear.
Hope you enjoyed my card!  

Friday, June 11, 2021

Jaunty Luka from La-La Land Crafts


Happy Friday!  This week our theme over at La-La Land Crafts is For the Boys- and I was so excited to work with Jaunty Luka.   


I stamped him on Copic Xpress It cardstiock with Memento Tuxedo Black Ink and cut him out with my Scan N Cut.   I colored him with Copic Markers:


COPIC COLORS

Skin: E00, E11, E21, RV10

Hat and Vest: E31, E43, E51, E74, E79

Hair and Shoes: E71, E74, E77, E79

Shirt: RV10

Pants: B91, B93, B95, B97, B99

White Gel Pen

Archival Ink- Coffee


I used papers from both Hodgepodge Christmas and Hello Baby to create my base layers.

I used the Heart Globe Die, and Vintage Bike Die to add more of a vintage feel to Luka.


I cut a circle from the Stitched Nested Circles Die and then cut the Large Clock Die and layered on top.    The clock gives me a feel of a pocket watch that is open and I love the vintage feel.


I added the Postmark Die, Notebook Border Die, Postage Squares Die and Ticket Die all to the card in various places.  

I lightly inked all dies and paper with Archival Ink in Coffee to carry the Vintage through the card.

I used the back wheel from the bike in the middle of the clock for a different embellishment (rather than the middle).

I added my sentiment on the 2nd smallest if the Long Flags, and then added a few enamel dots scattered around the card.

I love how this turned out and hope you enjoyed.

Make sure to join our LLLC FAN GROUP on Facebook for more ideas, 

inspiration and a general chit chat about our products!

Hoping you all have a great week of Creating

Angela


Wednesday, June 9, 2021

MEMORIAL DAY AT FORT LOGAN NATIONAL CEMETERY

 Hey everyone! Angela here, back with another scrapbook page to share. This month, our featured Product is Pop Tone Cardstock, and one of our themes is Patriotic. When it comes to Patriotic, I don’t think it gets any more serene than a National Cemetery like Fort Logan National Cemetery, where we visit frequently to put flowers out for my little brother.

I started by cutting a piece of Pop Tone Whipped Cream Cardstock at 8″x 8″. I then cut a piece of pattern paper down to 7 3/4″ x 7 3/4″.

Next I inked my edges of both papers with Tim Holtz Distress Oxide in Chipped Sapphire. Normally used a blending tool, but this time I used a sponge. I like the soft whisps the sponge gives.

Next I cut a coordinating strip of pattern paper down to 2.5″ x 8″ and inked the edges with my ink.

I then adhered it about 2/3 of the way down on the layout.

Next I took the Pop Tone Wild Cherry Cardstock and cut a piece at 7″ x 4 3/4″, and a piece of pattern paper at 6 3/4″ x 4.5″

Once I had these pieces cut I inked them with the same Chipped Sapphire Ink Pad.

and now for the photos. I took two of my photos and cut them down to 5″ x 3 1/4″ and 2 3/4″ 4 1/4″, and then cut mats for each – sizing up 1/4″ for each. Next I inked the white mats with my inkpad.

I then adhered them to layout, slightly shifted and overlapping.

Next I took some coordinating stickers that went with the pattern paper and inked the edges. I added a brad to both of the pinwheels, and added several to the layout, along with several other stickers

I also inked the journal sticker (but have not filled out yet as I sometimes struggle for words when it comes to my brother.

and for the finished product. On a side note, in doing this post I realized I did not ink my other pinwheel but can ink it before putting in my album.

I hope that you enjoyed my page. Every time we visit, the sheer breathtaking nature leaves me speechless.

Until next time.

See you soon!